What is the best charcoal setup for a Weber kettle?
The best charcoal setup depends on the cook. Use Two Zone for general grilling, Snake for low and slow, Minion for moderate length smokes, Vortex for high heat wings, and Slow ‘N S
Introduction
The Weber kettle is one of the most versatile cookers ever made. With the right charcoal layout and vent management, you can grill steaks, smoke ribs, roast whole chickens, slow cook brisket, and crisp wings at restaurant quality levels.
This guide covers the essential charcoal methods every Weber kettle owner should master. Each technique includes:
- what it is
- best uses
- why it works
- how to set it up
- lit vs unlit amounts
- vent settings
Understanding Your Weber Kettle Vents
Charcoal performance depends on oxygen flow. Your vents determine heat, fire behavior, and smoke quality.
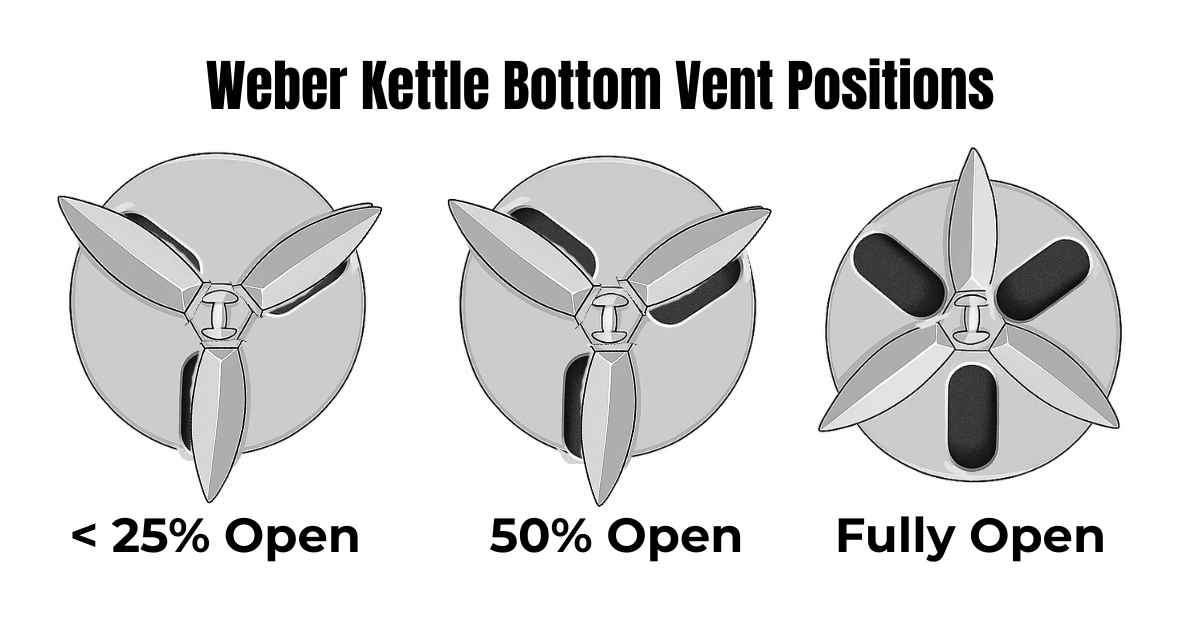
Bottom Vent
Controls how much oxygen enters the fire.
Top Vent
Controls airflow leaving the kettle.
Always keep it fully open for clean smoke.
The Three Most Useful Vent Settings
Low and Slow (225 to 275 degrees)
- Bottom vent: 10 to 25 percent open
- Top vent: fully open
Medium Heat (300 to 350 degrees)
- Bottom vent: 25 to 50 percent open
- Top vent: fully open
High Heat (400 to 500 plus degrees)
- Bottom vent: fully open
- Top vent: fully open
Important Vent Notes
- Vent changes take 5 to 10 minutes to show results
- Wind and temperature affect settings
- Too many lit coals can overpower vent adjustments
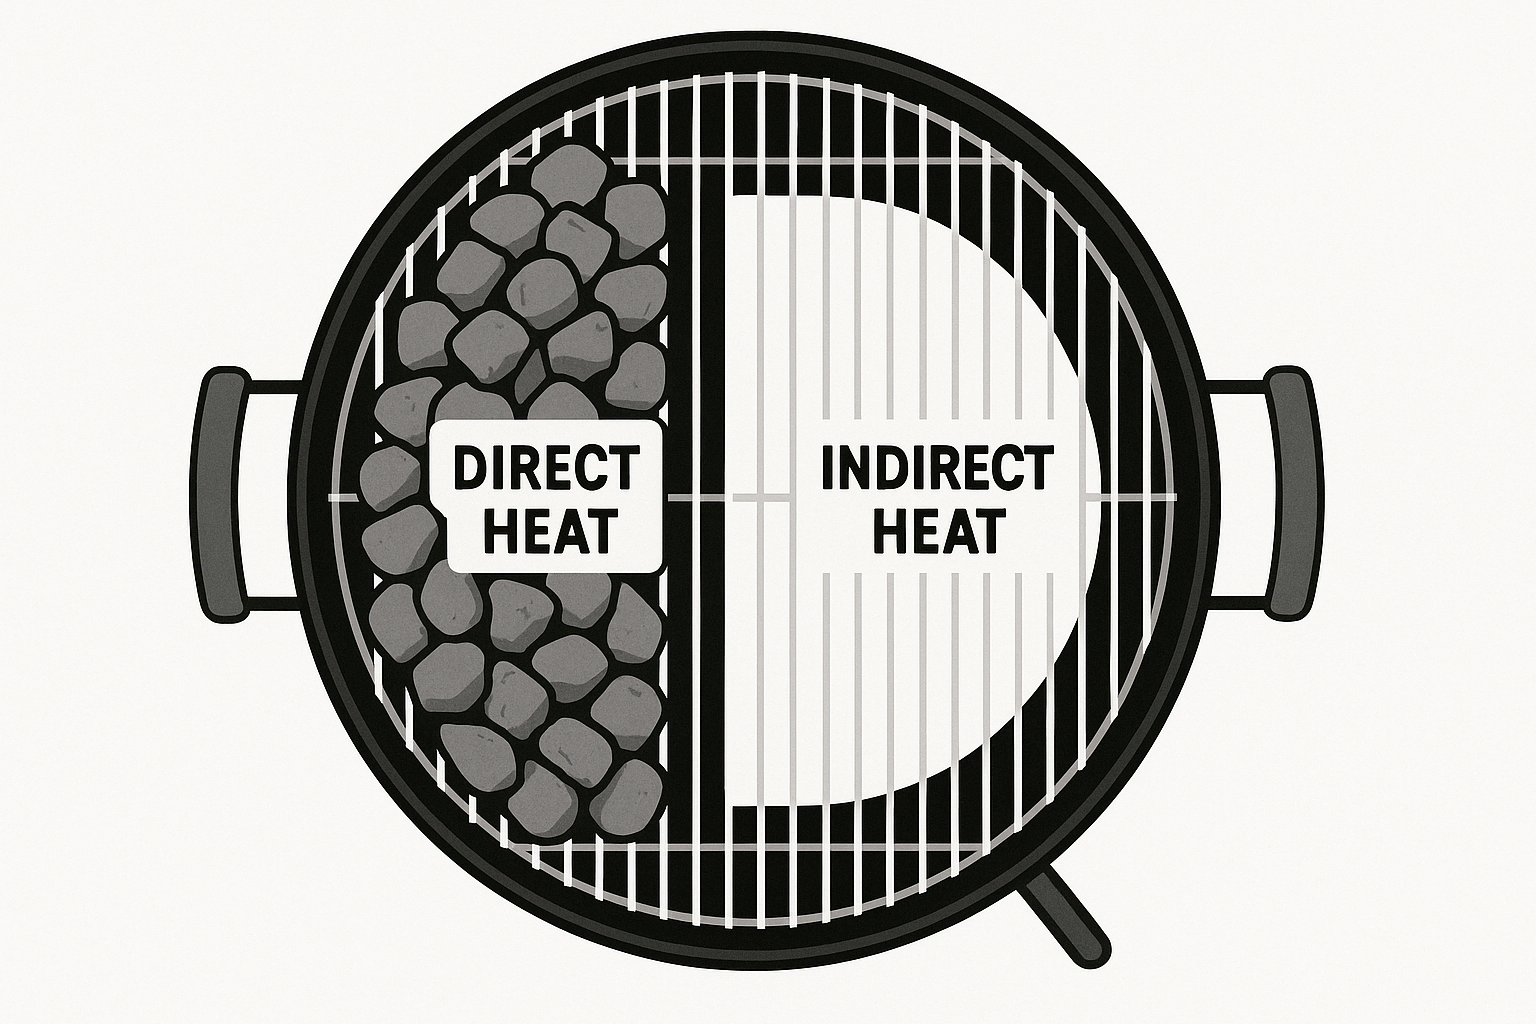
Method 1: Two Zone Setup
What It Is
Lit charcoal sits on one side of the grill to create a direct and indirect cooking zone.
Best For
- steaks
- burgers
- pork chops
- chicken pieces
- vegetables
Why It Works
You can sear over the hot zone then finish gently on the indirect side.
How to Set It Up
- Fill chimney three quarter to full.
- Light coals and let them ash over.
- Dump lit charcoal onto one side.
- Leave opposite side empty.
- Preheat grate 10 minutes.
Lit vs Unlit
- Lit: full or three quarter chimney
- Unlit: none
Vent Settings (350 to 500 degrees)
- Bottom vent: fully open
- Top vent: fully open
Method 2: Snake Method
What It Is
A long curved row of briquettes that burns slowly for hours.
Best For
- ribs
- pork butt
- brisket
- long low and slow cooks
Why It Works
Only a few briquettes burn at a time, creating rock steady temperatures.
How to Set It Up
- Build a 2 wide by 2 tall snake of unlit briquettes around one third to one half of the kettle.
- Place wood chunks on top.
- Light 6 to 8 briquettes in a chimney.
- Place lit coals at the start of the snake.
- Put meat on the indirect side.

Lit vs Unlit
- Lit: 6 to 8
- Unlit: full snake
Vent Settings (225 to 275 degrees)
- Bottom vent: 10 to 25 percent open
- Top vent: fully open
- Top vent positioned over meat
Method 3: Minion Method
What It Is
Unlit briquettes form a pile with lit coals placed on top for slow ignition.
Best For
- chicken
- turkey
- sausage
- small roasts
- 3 to 6 hour cooks
Why It Works
Lit coals ignite unlit coals gradually, creating stable medium heat.
How to Set It Up
- Fill half the charcoal grate with unlit briquettes.
- Light 10 to 12 briquettes in the chimney.
- Pour lit briquettes on top of the unlit pile.
- Add wood chunk if desired.

Lit vs Unlit
- Lit: 10 to 12
- Unlit: full pile
Vent Settings (250 to 300 degrees)
- Bottom vent: 15 to 30 percent open
- Top vent: fully open
Method 4: Vortex Method
What It Is
A cone shaped insert that channels intense heat upward.
Best For
- chicken wings
- drumsticks
- high heat searing
Why It Works
The Vortex boosts airflow and concentrates heat for extreme crisping.
How to Set It Up
- Place Vortex in center, narrow end up.
- Fill with a full chimney of lit coals.
- Arrange wings around the perimeter.
Lit vs Unlit
- Lit: full chimney
- Unlit: none
Vent Settings (425 to 475 degrees)
- Bottom vent: fully open
- Top vent: fully open
Method 5: Slow ‘N Sear Method
What It Is
A stainless basket with a water reservoir for stable long burns.
Best For
- ribs
- chicken
- pork loin
- reverse seared steaks
- 4 to 8 hour cooks
Why It Works
The water reservoir helps stabilize temperatures and directs heat.
How to Set It Up
- Place Slow ‘N Sear against the kettle wall.
- Fill basket with unlit briquettes.
- Add water if smoking.
- Light 8 to 10 briquettes.
- Add lit coals to one end of the basket.
Lit vs Unlit
- Lit: 8 to 10
- Unlit: full basket
Vent Settings
Smoking (225 to 275 degrees)
- Bottom vent: 10 to 20 percent open
- Top vent: fully open
Roasting (300 to 350 degrees)
- Bottom vent: 30 to 50 percent open
- Top vent: fully open
Searing
- Bottom vent: fully open
- Top vent: fully open
How to Light Charcoal With a Chimney Starter
Low and Slow (Snake, Minion, Slow ‘N Sear)
- Light 6 to 12 briquettes
- Only enough to start the burn
- Do not dump full chimney
Medium Heat
- Light half chimney
- Great for chicken, chops, veggies
High Heat and Searing
- Light full chimney
- Ideal for steaks, burgers, Vortex wings
FAQ
Should I soak wood chips?
No. It creates steam and delays smoke production.
Should I leave the top vent open?
Yes. Always fully open for clean airflow.
How long should I preheat?
10 minutes for grilling, 15 minutes for smoking.
Which charcoal is best?
Briquettes offer stable heat. Lump is best for high heat.
Helpful Gear for Your Cook
- Chimney starter
- Vortex insert
- Slow ‘N Sear basket
- Probe thermometer
- Premium briquettes
- Wood chunks
- Weber charcoal baskets
Internal Link Suggestions
- How to Grill Anything on a Weber Kettle
- How to Hold Any Temperature on a Weber Kettle
- How to Add Smoke Flavor
- Best Weber Kettle Accessories
- BBQ Glossary: airflow, vents, charcoal types
Let us know
Which charcoal method do you use most on your Weber kettle? Did we miss your go-to setup? Share your experience in the comments and help other pitmasters build confidence around the fire.